Last Updated: October 23, 2026
Quick Summary
Choose durable outdoor gear for remote exploration by checking stitching density, hardware rigidity, fabric weight and weave, seam sealing and repairability before you buy. Spend on shelter, sleep systems, footwear and navigation, and save weight on camp furniture and cooking extras. A small field repair kit and a pre-trip maintenance routine extend gear life far more than paying for a pricier version.
- Remote trips punish gear through continuous load, no resupply or repair shop, and longer weather exposure.
- Inspect the weakest point first: the shoulder strap junction on packs and the pole hub on tents.
- Build navigation as three tiers: offline GPS, paper map and compass, and a satellite SOS device.
- Plan off-grid power by calculating daily draw, sizing the solar panel, and carrying a battery bank.
- Carry fabric patches, spare buckles, zip ties, a multi-tool, duct tape and cord for field repairs.
Table of Contents
- Durable Outdoor Gear for Remote Exploration: What Actually Survives
- How to Judge Durability Before You Buy
- Remote Camping Essentials: Packs, Shelter and Sleep Systems
- Best Equipment for Overnight Hiking: Footwear and Layering
- Camping Navigation Tools That Work Without a Signal
- Off-Grid Camping Power and Lighting
- Weight Versus Durability: Where to Spend and Where to Save
- Maintenance and Field Repair for Durable Outdoor Gear
- Frequently Asked Questions
Durable Outdoor Gear for Remote Exploration: What Actually Survives
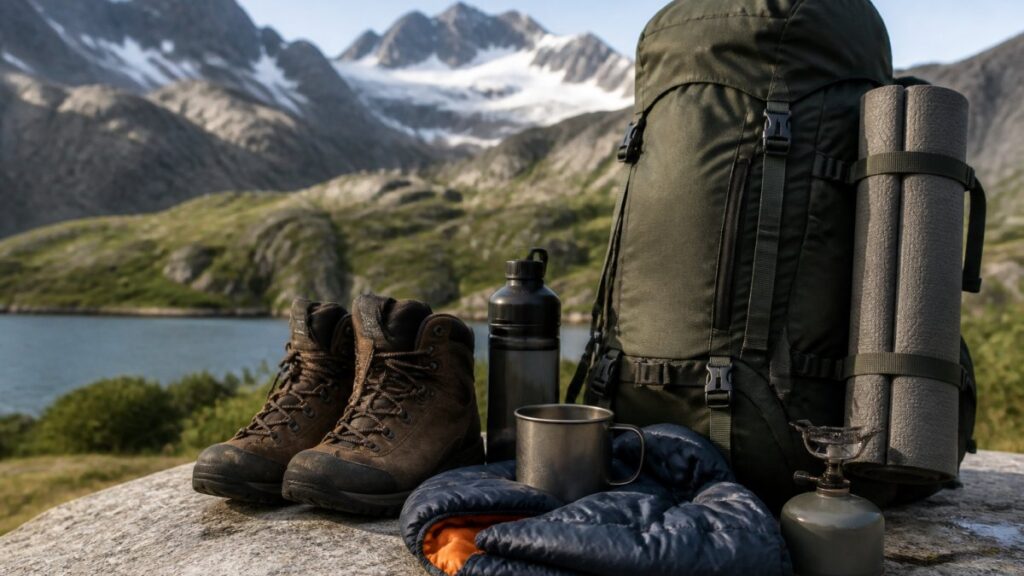
Remote exploration is unforgiving on equipment. A strap that frays on a weekend trail becomes a pack failure three days from the nearest road. This guide from CampNation explains how to choose durable outdoor gear for remote exploration.
Most buyers judge gear by how it feels in a shop, not how it behaves after 40 days of sun, grit and pack abrasion. “Heavy-duty” and “expedition-grade” are marketing words, not standards.
Why remote trips punish gear differently
Distance is the multiplier: a worn buckle is an inconvenience on a weekend trip but can end a remote one.
Remote trips punish gear in three specific ways:
- Continuous load. Packs stay loaded for days, so every seam and strap junction takes sustained stress rather than short bursts.
- No resupply or repair shop. You carry what you carry. A field repair kit becomes essential equipment, not an optional extra.
- Weather exposure without shelter breaks. Gear stays wet, UV-exposed and cold for longer, which accelerates wear on coatings, zips and webbing.
How to Judge Durability Before You Buy
Durability is the ability to keep performing under repeated load, weather exposure and abrasion without failing at a critical point. Five checks, none requiring lab equipment, let you assess it before purchase.
The five-point durability check
Use this checklist on any item before you commit:
- Stitching density and type. Look for tight, even stitching with reinforced bar tacks at strap junctions and load points. Loose or single-row stitching on a pack shoulder strap is a failure waiting to happen.
- Hardware quality. Buckles and adjusters should feel rigid, not flex under thumb pressure. Metal hardware should be free of sharp edges that cut webbing.
- Fabric weight and weave. Heavier denier fabrics resist abrasion better, but check the weave is tight. A loose weave in a thick fabric still snags and tears.
Ask one question most buyers never ask: what happens at the weakest point? On a pack, that is usually where the shoulder strap meets the body. On a tent, it is the pole hub and the peg-out points. Inspect those junctions first, because that is where remote trips expose weaknesses.
Run these five checks on any item before you commit to it.
| Check | What to look for |
|---|---|
| Stitching density and type | Tight, even stitching with reinforced bar tacks at load points |
| Hardware quality | Rigid buckles and adjusters; metal free of sharp edges |
| Fabric weight and weave | Heavier denier and a tight weave that resists snagging |
| Coatings and seam sealing | Taped or sealed seams, not just fabric called waterproof |
| Repairability | Replaceable buckles, patchable fabric, re-sewable straps |
Remote Camping Essentials: Packs, Shelter and Sleep Systems
Packs, shelter and sleep systems carry the most load and take the most punishment. For remote camping essentials, optimise for the consequences of failure, not the lowest packed weight or price, a torn shoulder-strap box stitch, a snapped pole hub or a bag that loses loft after a damp week can each end a trip days from the nearest road.
Packs: load paths and abrasion zones
On a remote route, a pack stays loaded for days, is set down on grit, dragged through scrub and compressed into vehicle or boat transfers. Judge it by load paths and abrasion zones, not headline capacity.
- Harness and load path. Check the bar tacks and box stitching where shoulder straps and load-lifter straps meet the body. Single-row stitching at these junctions is a common failure point under sustained load. Look for double stitching, reinforced webbing and metal or heavy composite hardware rather than thin acetal buckles.
- Abrasion zones. The base, lower side panels and belt wings take the most contact with rock and ground. Heavier denier fabric in these zones, even if the main body is lighter, is a sensible durability trade. A tight weave matters as much as thickness.
- Capacity versus trip length. Match capacity to days between resupply, not a generic day-hike figure. A remote daypack needs tougher materials than a commuter pack.
Shelter: pole strength, peg-out points and seam sealing
Shelter failure in remote country is usually a pole, a peg-out point or a seam, not the fly fabric.
- Poles. Check the pole diameter and the hub design. A snapped pole at the hub is difficult to repair in the field without a splint and tape, so carry a pole repair sleeve. Aluminium poles are generally more field-repairable than composite.
- Peg-out points. Reinforced webbing loops and multiple peg-out options let you pitch in wind and on hard or soft ground. Weak peg-out points tear out first in gusty conditions.
- Seam sealing. Waterproofing lives in the coating and the seams. Check whether seams are taped or sealed, not just whether the fabric is described as waterproof. Re-seal seams before remote trips as part of your pre-trip routine.
Sleep systems: loft retention and damp management
Sleep systems come down to fill quality, shell fabric and damp management. For remote trips, a down bag with a water-resistant shell and a realistic temperature rating is a sound starting point.
- Temperature margin. Choose a rating with a margin for cold nights and for the fact that a bag loses loft when damp. A bag rated exactly to expected lows leaves no buffer for a cold snap or a wet shell.
- Damp management. A water-resistant shell and a dry bag or compactor bag liner protect loft. Down that stays wet loses insulating value and takes time to dry in remote conditions.
- Service life. Shell fabric abrasion and zip wear are the usual end-of-life points. A bag with a repairable zip and a patchable shell lasts longer than one with a sealed, non-replaceable zip.
Matching the kit to conditions
There is no universal remote kit: a shelter for a cold, windy alpine route is overbuilt for a hot, humid lowland trip. Select for expected wind exposure, rainfall, overnight lows and ground conditions, and carry repair capacity for the failure modes those conditions create.
Best Equipment for Overnight Hiking: Footwear and Layering
Footwear and layering decide whether an overnight hike is comfortable or miserable, and both fail in predictable ways. The best equipment for overnight hiking balances support, weather protection and weight, and on a remote route it must keep working after days of wet, grit and abrasion.
Footwear: support that survives a wet week
On footwear, check three things: sole stiffness, rand protection around the toe and heel, and whether the upper holds its shape when wet. A boot that softens after a wet day loses support when you need it most.
- Sole stiffness and lug depth. A stiff enough sole protects against rocky ground and reduces foot fatigue under load. Lug depth and rubber compound matter on wet roots and mud; a worn sole is a remote-trip liability, so check wear before departure.
- Rand and toe protection. A rubber rand around the toe and heel protects the upper from rock abrasion and scree. This is the zone that fails first on rough ground.
- Upper construction. Leather holds shape but dries slowly; synthetic dries faster but can soften. Whichever you choose, check that the upper holds its shape when wet and that seams are protected.
Layering: manage moisture first, warmth second
Layering works on a simple principle: manage moisture first, warmth second.
- Base layer moves sweat away from skin. Synthetic or merino, not cotton. Merino resists odour over multi-day use; synthetics dry faster. Both are valid; cotton is not.
- Mid layer traps warmth. Fleece or light synthetic insulation. Synthetic insulation keeps some warmth when damp, which matters on remote trips where drying opportunities are limited.
- Shell layer blocks wind and rain. This is where waterproof materials and seam quality matter most. Check that seams are taped or sealed and that the shell has a repairable or replaceable zip.
Environmental conditions and regional selection
No single layering system suits every remote environment. Select for the conditions you expect:
- Hot and exposed. Prioritise breathability, sun protection and light colour. A wide-brim hat, UPF-rated clothing and sunglasses are equipment, not accessories, on exposed routes with little shade.
- Cold and wet. Prioritise insulation that retains warmth when damp, a shell with sealed seams, and a dry layer kept separate for camp.
- Windy and exposed. Prioritise windproof shells and secure closures; wind strips warmth faster than still cold.
The useful rule for remote trips: spend on anything that keeps you warm, dry, found or moving. Footwear and the shell layer are where failure is most costly, so they are the last places to save weight.
Camping Navigation Tools That Work Without a Signal
Navigation failure has immediate safety consequences, so it needs redundancy by design. Camping navigation tools that work without a signal include a paper map and baseplate compass, a GPS device with pre-loaded offline maps, and a satellite SOS communicator for emergencies beyond phone coverage.
Build a three-tier system:
- Primary: a GPS device or watch with offline maps downloaded before departure.
- Backup: paper map and compass, plus the skill to use them.
- Emergency: a satellite SOS device that works where there is no mobile coverage.
Test every device at home before you leave: offline maps never downloaded are not offline maps, and uncharged batteries are dead weight. For a deeper comparison, see our guide to reliable camping navigation tools.
The most common navigation mistake is treating a phone as a primary tool. Cold drains batteries fast, and a flat phone with no paper backup leaves you without a position fix. Carry the map and compass even when the device is working.
Off-Grid Camping Power and Lighting
Power and lighting fail quietly, which makes them easy to overlook until you need them. Off-grid camping power planning starts with calculating daily consumption, then matching solar input and battery capacity to it, with lighting as a separate essential system.
Work through it in this order:
- Calculate daily draw. Add up phone, headlamp, GPS and any camera charging.
- Size the panel. A portable solar panel charger should produce enough in realistic conditions, not ideal ones, to cover that draw.
- Carry a battery bank. Solar is weather-dependent, so storage bridges cloudy days.
For remote charging needs, a practical option to compare is a portable USB solar panel charger. If you are weighing several chargers against each other, our guide to compact solar chargers for backpacking covers the trade-offs in more detail.
Weight Versus Durability: Where to Spend and Where to Save
Every gram you remove has to come from somewhere, usually strength. The weight versus durability trade-off is the central decision in gear selection, and the answer depends on how remote the trip is and what a failure would cost.
Spend on the items where failure is serious:
- Shelter and sleep system. A torn tent or soaked bag ends the trip.
- Footwear. Blisters and lost support stop you walking.
- Navigation and emergency communication. These are safety equipment.
Save weight on the items where a lighter version is genuinely fine:
- Camp furniture and comfort extras. A lighter chair is a reasonable saving.
- Cooking extras. Simplify the kit rather than buying ultralight versions of things you do not need.
- Spare clothing. Carry less and manage layers instead.
The useful rule: spend on anything that keeps you warm, dry, found or moving. Save weight on everything else.
Maintenance and Field Repair for Durable Outdoor Gear
Maintenance separates gear that lasts a season from gear that lasts years, and field repair keeps a trip going when something fails anyway.
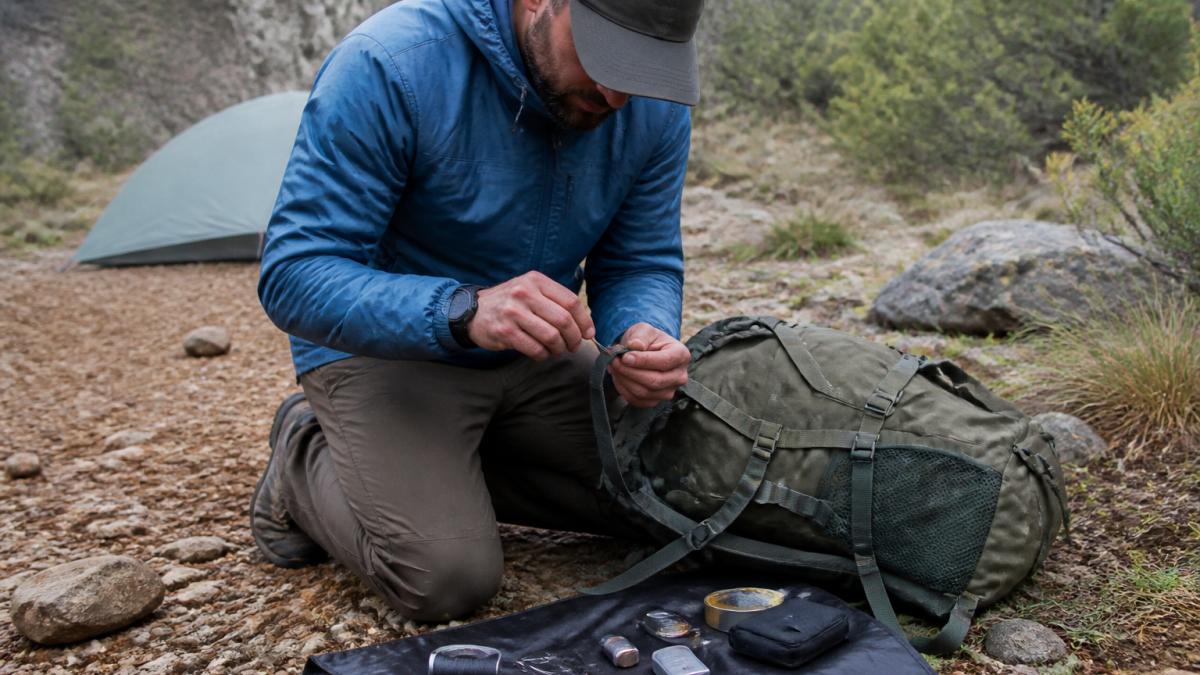
Before every remote trip, run this routine:
- Check and re-seal seams on tents and shells.
- Inspect pack straps, buckles and stitching at load points.
- Clean and re-lubricate zips, then test them fully open and closed.
Your field repair kit should cover fabric patches, a needle and heavy thread, spare buckles, zip ties, a multi-tool, duct tape and cord.
At CampNation, we select gear with these failure points in mind, because reliability in the field comes down to how equipment holds up, not how it reads on a spec sheet.
Frequently Asked Questions
How do you choose durable outdoor gear for remote camping?
Start with the construction details rather than the marketing label. Check the fabric denier and coating on packs and shelters, the type and number of stitches per seam, whether stress points are bar-tacked or reinforced, and whether zips and buckles are replaceable. Look for a stated repair or warranty policy, because a brand that supports repairs is usually confident in the build. Then match the gear to your conditions: abrasion resistance matters more on rocky ground, UV resistance matters more on long exposed trips, and waterproof ratings matter more in sustained rain.
What power and lighting gear is useful for off-grid camping?
For off-grid camping power, a folding solar panel paired with a power bank or portable station covers most multi-day trips, and you should size the panel to your daily draw rather than the other way around. Add a rechargeable headlamp with a spare battery or a USB-rechargeable model with a long low mode, plus a small lantern for camp. Keep a set of lithium batteries as backup for anything critical. Test the whole setup on a weekend trip before relying on it remotely, and check charge times in overcast conditions.
How should you prepare navigation and safety equipment for a remote trip?
Carry two independent navigation methods: a GPS device or phone app plus a paper map and baseplate compass you can actually use. A satellite messenger or personal locator beacon is the safety item worth the weight if you are going beyond reliable phone coverage. Log a trip plan with someone at home, carry a first aid kit suited to the terrain, and pack fire starting, extra food and a water supply or filter. Check every battery and download offline maps before you leave, not at the trailhead.
What is the best equipment for overnight hiking?
The best equipment for overnight hiking is the lightest setup that still handles your worst expected conditions. That usually means a pack sized to your load (around 40-55 litres for one or two nights), a shelter rated for the wind and rain you may meet, a sleeping bag matched to overnight temperatures with a suitable mat underneath, and footwear broken in before the trip. Add a headlamp, navigation tools, water treatment and a small repair kit. Buy for reliability first, then trim weight where the consequences of failure are low.
Remote trips expose gear weaknesses that weekend use hides, and the fix is a buying process built on stitching, hardware, repairability and honest weight trade-offs rather than marketing labels. If you want equipment chosen for that standard, CampNation stocks premium gear built to last, with carefully selected products for reliability and performance and quick, reliable shipping so your kit arrives ready. Get started with CampNation and head out with gear you can trust when the trail gets long.